Fluffy Pancake Recipe
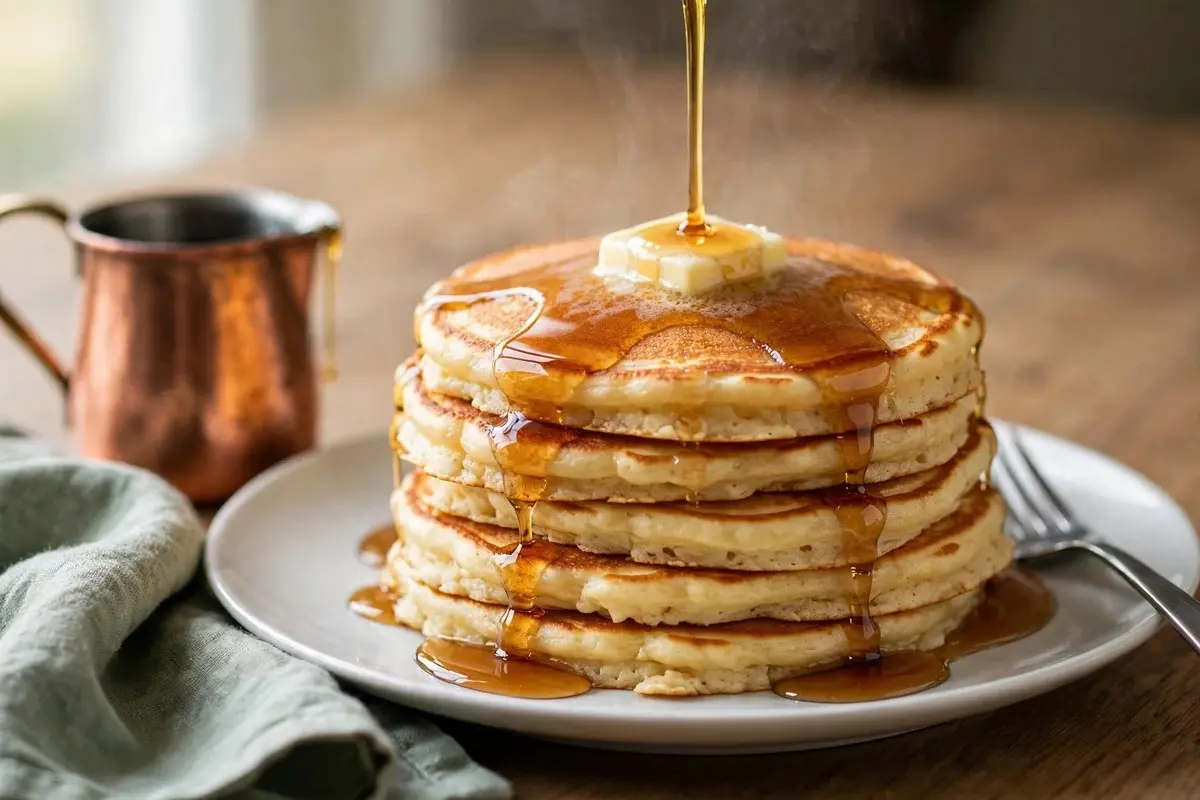
Most homemade pancakes come out flat because of two things that have nothing to do with the ingredient list: the batter gets whisked smooth, and the pan runs too hot. This pancake recipe fixes both with a lumpy batter, a 10-minute rest, and a griddle held at 350°F. You get pancakes with a crisp golden edge, a tender crumb, and enough height that butter sinks in instead of sliding off.
Why You'll Love This Recipe
- Pantry ingredients only. Flour, sugar, baking powder, baking soda, salt, buttermilk, eggs, butter. Nothing you need to shop for on a Saturday morning.
- Ready in 40 minutes, including the batter rest, and most of that is hands-off.
- They freeze better than almost any other breakfast. Cook a double batch, freeze flat, toast straight from frozen on a weekday.
- The dry mix scales. Whisk up three or four batches of the dry ingredients, jar them, and weekday pancakes become a five-minute job.
Here's the one thing nobody tells you: grease the griddle, then wipe it almost dry with a folded paper towel before the batter goes in.
A pool of butter or oil fries the outside of the pancake unevenly, which is where those blotchy dark rings and pale patches come from. What you want is a thin film, barely visible.
The pancake browns in one even sheet instead of a leopard pattern, and you re-wipe between batches to clear the browned butter solids that would otherwise scorch.
This one habit did more for how my pancakes look than any change to the batter.
Read Before You Start
Weigh your flour, or at least spoon and level it. Dipping the measuring cup straight into the bag packs in 20 to 25 percent extra flour, which is the single most common reason a batch turns out dry and heavy. Two cups should weigh 240 grams. If you don't have a scale, fluff the flour with a fork, spoon it into the cup, and sweep the top level with a knife.
Test your leavening before you commit. Baking powder and baking soda lose strength once opened, usually within six months. Drop half a teaspoon of baking powder into hot water; it should fizz immediately. Baking soda needs acid, so test it in a spoonful of vinegar. Flat leavening means flat pancakes, and it's the one variable in this pancake recipe you can't rescue at the griddle.
Ingredient Deep Dive & Notes
Every ingredient in this pancake recipe is doing a specific job, and two of them are not worth swapping.
All-purpose flour is the right choice here. Bread flour has too much protein and turns the crumb chewy, and cake flour goes so soft the pancakes can't hold their own height with this much liquid.
Real buttermilk, and please don't substitute plain milk straight across. The acid in buttermilk does two jobs: it reacts with the baking soda for lift, and it tenderizes the gluten so the crumb stays soft. Swap in plain milk with no acid added and you lose both, which gives you a pancake that's pale, flat, and slightly rubbery. There's a proper substitute below if you don't have buttermilk on hand.
Baking powder and baking soda both. The soda reacts with the buttermilk right away and gives you the initial rise; the baking powder is double-acting and delivers a second push once the batter hits the hot griddle. Using only one of them gives you about half the height.
Melted butter, cooled for a minute or two. If you pour hot butter into cold buttermilk it seizes into little solid flecks that never distribute. Let it sit off the heat while you whisk the dry ingredients, then whisk it into the eggs first, before the buttermilk goes in.
Sugar earns its place beyond sweetness. Two tablespoons is not enough to make these dessert-sweet, but it's what browns the surface. Cut it entirely and the pancakes stay disappointingly pale.
Vanilla extract is optional. It rounds out the flavor but the pancakes work fine without it. Vanilla bean paste is a straight swap if you prefer to skip alcohol-based extract.
Equipment Needed
- Electric griddle or a large flat skillet. An electric griddle is genuinely easier here because you can set 350°F and hold it. Cast iron works beautifully but needs a couple of minutes to settle between batches. Nonstick is fine and the most forgiving.
- A ¼-cup scoop or ladle so every pancake is the same size and cooks in the same time.
- A thin, flexible spatula. A thick, stiff one drags and tears the delicate top before the flip.
- A wire rack set over a sheet pan for holding cooked pancakes. Stacking them on a plate traps steam and turns the bottoms soggy.
- An instant-read thermometer is optional but useful, both for the griddle surface and for checking a thick pancake's center.
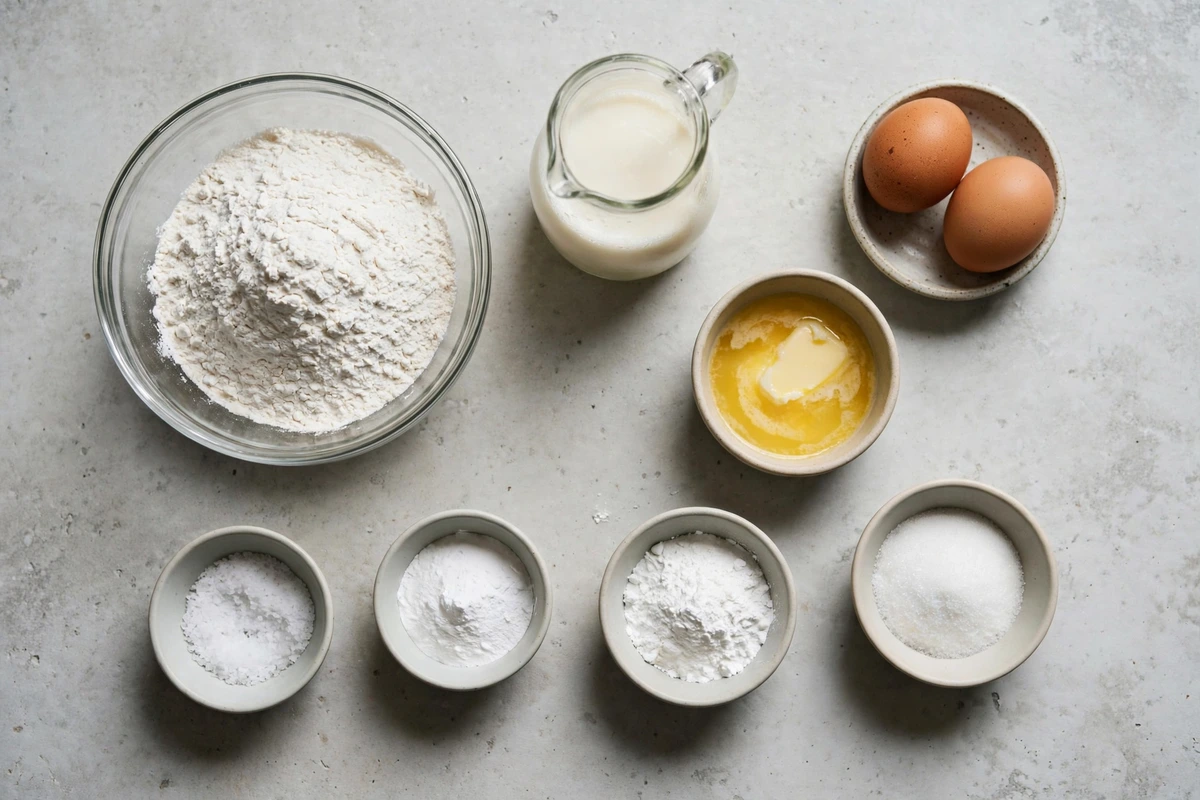
Pancake recipe ingredients laid out: flour, buttermilk, eggs, butter, sugar, baking powder and salt
Detailed Step-by-Step Cooking Guide
Whisk the dry ingredients until evenly mixed
Combine the wet ingredients in the right order
Fold, don't whisk
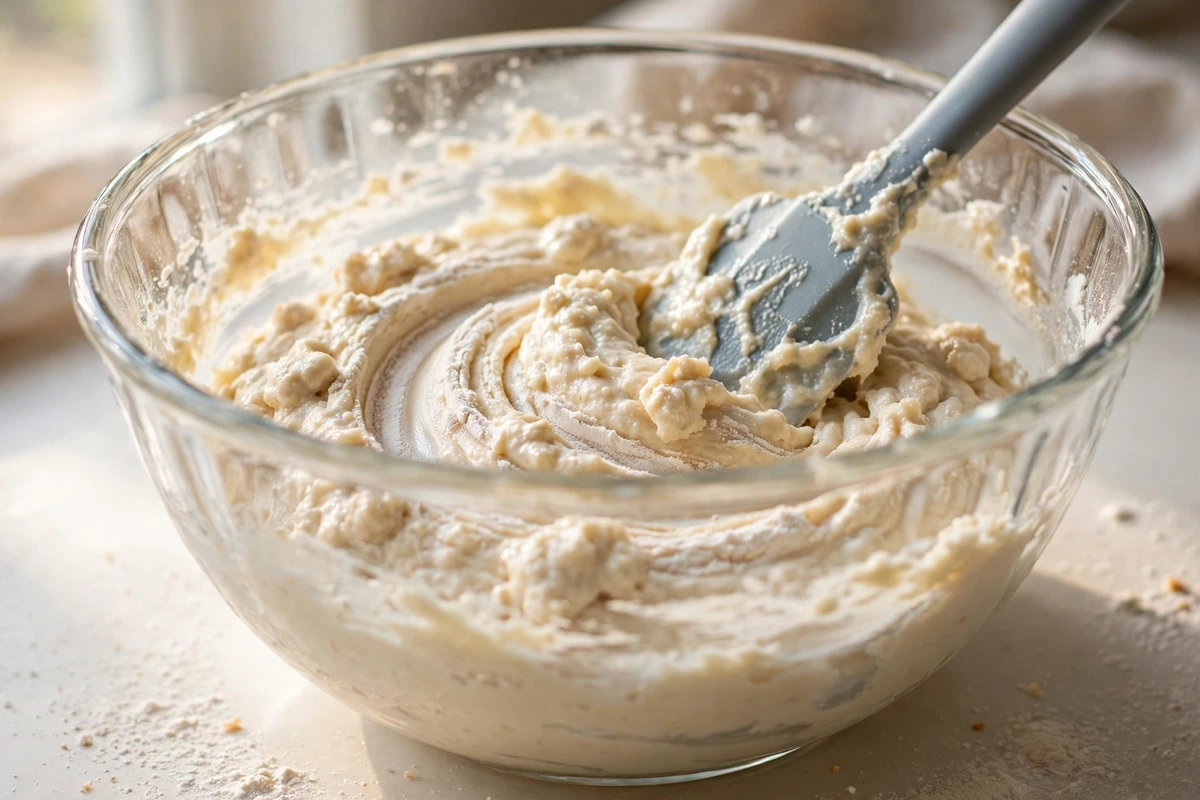
Thick lumpy pancake batter in a glass bowl with a spatula, showing the correct undermixed texture
Rest the batter for 10 minutes
Heat the griddle to 350°F and check it
Cook the first side until the edges go matte
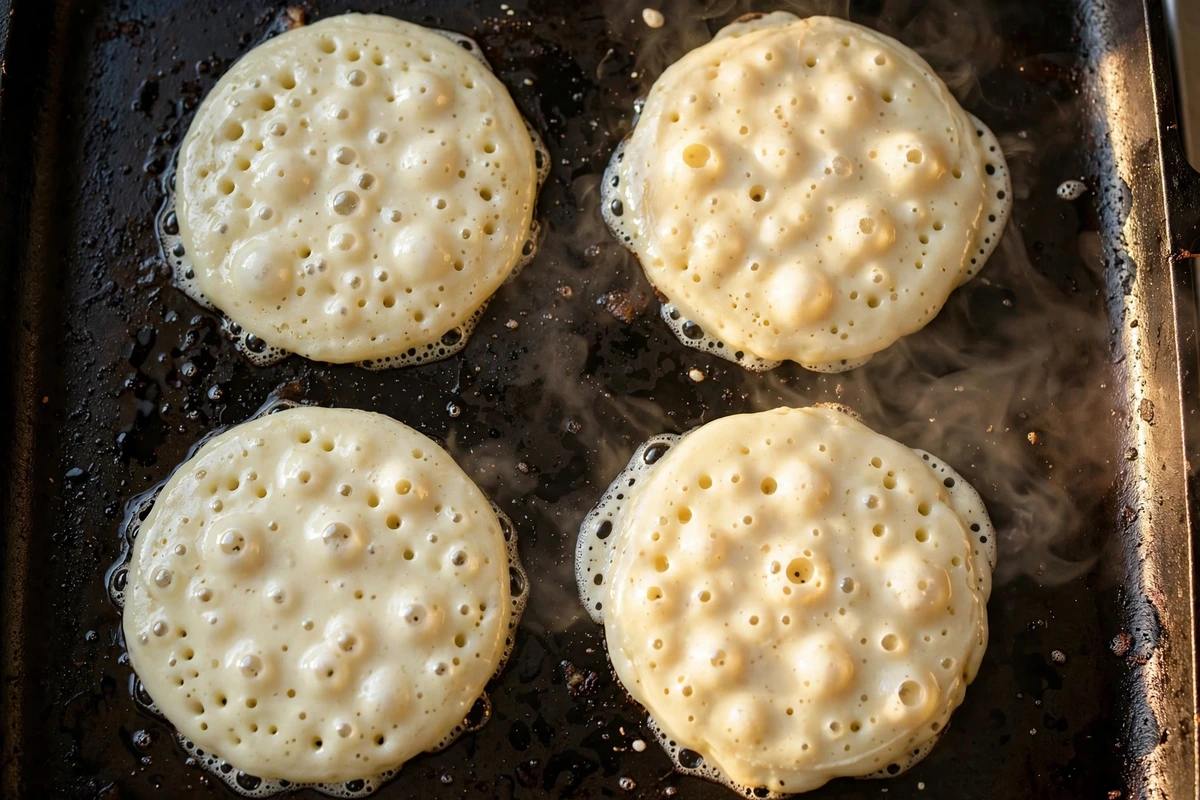
Pancakes cooking on a griddle with bubbles forming across the surface, ready to flip
Flip once, then leave them alone
Getting the Fluffy Texture Right
Every way this pancake recipe goes wrong has one likely cause, and all of them are fixable in the next batch.
Tear one open. You want an even, slightly moist crumb with small holes throughout, no dense wet streak in the middle, and a distinctly crisp thin edge. The pancake should compress under a fork and spring back a little.
The usual suspect is old baking powder or baking soda. After that, an overmixed batter that lost its air, or a batter left sitting so long the leavening was spent. Occasionally it's too much liquid, which is what happens when flour gets measured light.
The griddle was too hot, so the surface set before the interior finished. Drop the heat and give them an extra minute per side.
Overmixing, almost every time. Next batch, fold fewer strokes and accept the lumps.
Not enough sugar, or a griddle running under 325°F. Browning needs both heat and sugar.
That's normal and not a fault in the batter. The griddle hasn't evened out yet. Cook one, judge the color and timing off it, adjust, and move on.
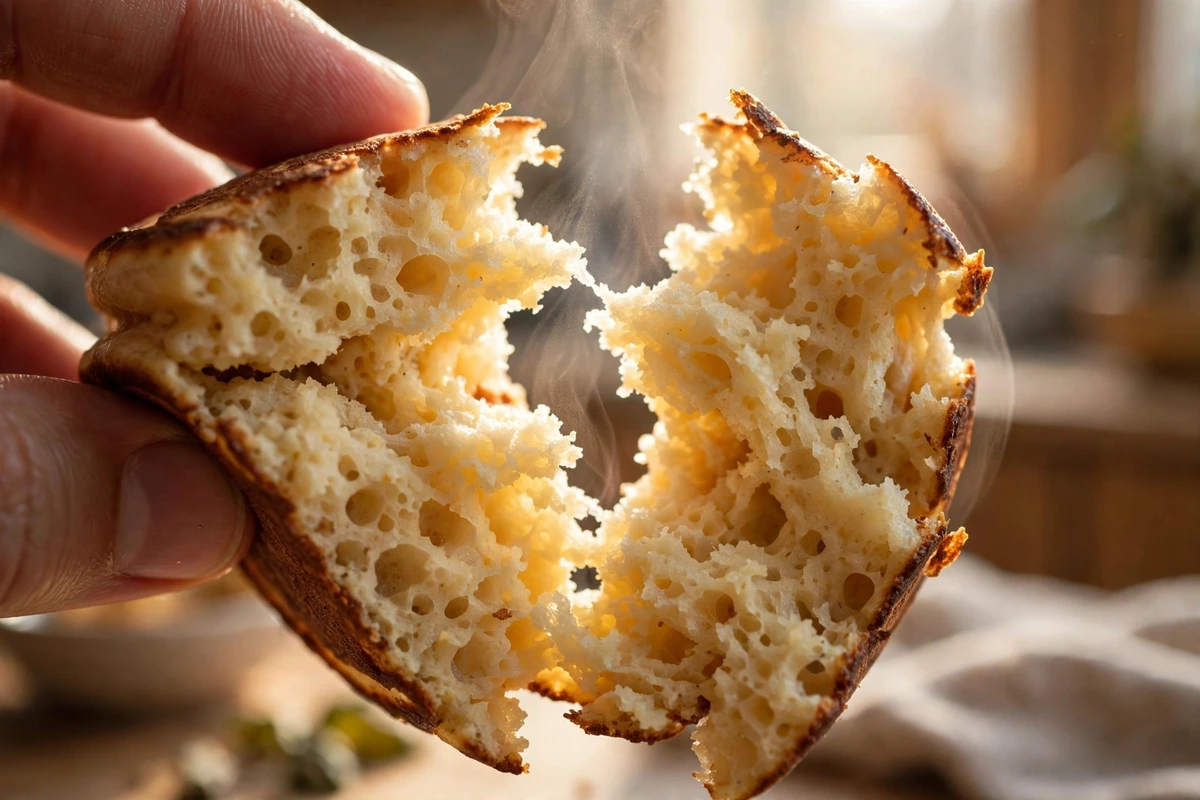
Pancake torn open showing a fluffy even crumb with small air pockets inside
How to Use This Pancake Recipe Beyond Breakfast
How to Serve, Store & Reheat
Warm the syrup for 20 seconds in the microwave. Cold syrup on hot pancakes drops the temperature of the whole stack immediately. Butter goes on between layers, not just the top, so it actually melts. For a complete weekend brunch spread, serve with savory squares of Hashbrown Breakfast Casserole, freshly baked Soft Cinnamon Rolls with cream cheese frosting, chilled glasses of Strawberry Banana Smoothie, or homemade iced coffee breves from our 15 Dutch Bros Drinks collection.
Cool completely on a wire rack first, then refrigerate in an airtight container for up to 3 days. Warm pancakes sealed in a container steam themselves soft. Uncooked batter is not worth storing beyond about 30 minutes because the leavening is spent; refrigerate leftover raw batter no longer than 24 hours if you must, and expect flat results.
A toaster on medium is the best method by a wide margin, since it re-crisps the edges. In the oven, spread them on a sheet pan at 350°F (175°C) for 5 to 8 minutes. The microwave works in 20 to 30 second bursts but gives you a soft, slightly chewy pancake.
Yes, and they freeze exceptionally well. Cool completely, lay flat on a sheet pan and freeze until firm, then transfer to a freezer bag with parchment between the layers. They keep up to 2 months. Reheat straight from frozen in the toaster, or 8 to 10 minutes in a 350°F oven. No thawing needed.
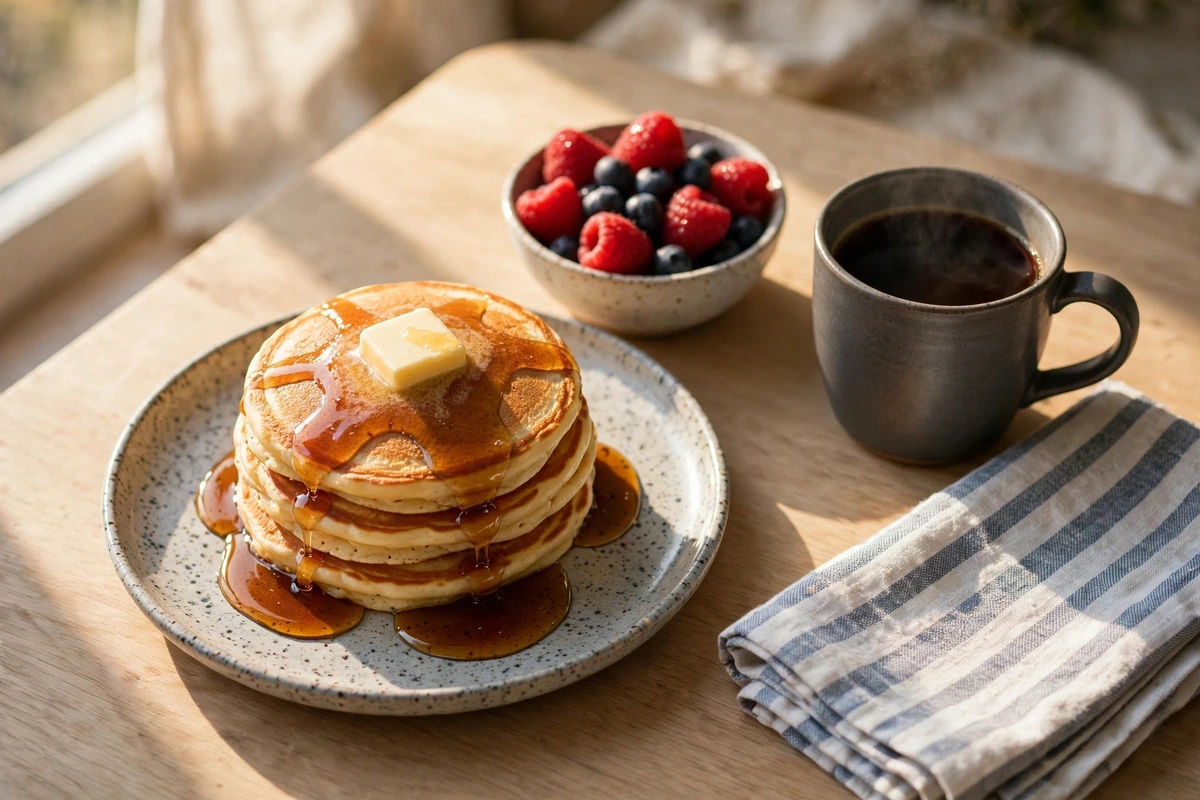
Fluffy Pancake Recipe plated and served
Dietary Variations & Adaptations
Swap in a cup-for-cup gluten-free flour blend that already contains xanthan gum, at the same 240 gram weight. Extend the batter rest to 20 minutes, because rice-based flours hydrate slowly and a short rest leaves a gritty texture. Expect a slightly more delicate pancake, so make them a little smaller and flip carefully.
Replace the buttermilk with 1¾ cups unsweetened soy or almond milk plus 1½ tablespoons lemon juice, rested 10 minutes to curdle. Soy works better than almond here because its higher protein content browns more like dairy. Swap the melted butter for melted refined coconut oil or a vegan butter block.
Replace the 2 eggs with 2 tablespoons of cornstarch whisked into an extra 3 tablespoons of buttermilk. The pancakes will be a touch flatter and more tender. Cook them a minute longer per side at a slightly lower temperature, since the egg structure that normally sets the interior isn't there.
Once a pancake is on the griddle, resist doing anything to it. The interior of a pancake is a foam: bubbles of carbon dioxide and steam held in a batter that's still liquid until heat sets the proteins and starch.
Pressing down with the spatula collapses that foam permanently, and flipping repeatedly interrupts the setting process. Both give you the same result, a thin dense disc, and both are irreversible once done.
One flip, no pressing, and let heat do the work.
Allergen Notice: This recipe contains wheat/gluten (all-purpose flour), eggs, and dairy (buttermilk, butter). Substitutions for each are listed in Dietary Variations above: a cup-for-cup gluten-free blend for the flour, cornstarch and extra liquid for the eggs, and plant milk plus acid with vegan butter for the dairy. Cross-contamination depends entirely on the specific brands and the kitchen you're cooking in, so I can't tell you this recipe is safe for any particular allergy. Read the labels on every product you use and check with a medical professional about your own situation.
Frequently Asked Questions
Recipe Visual Gallery (6 Full Photos)
Recipe Card & Steps
Ingredients Checklist
Click an item to check it off as you prep
- 2 cups(240 g) all-purpose flour, spooned and leveled
- 2 tablespoons(25 g) granulated sugar
- 2 teaspoonsbaking powder
- 1 teaspoonbaking soda
- ¾ teaspoonfine sea salt
- 2large eggs
- 3 tablespoons(42 g) unsalted butter, melted and cooled slightly
- 1 ¾ cups (420 ml)buttermilk
- 1 teaspoonvanilla extract (optional)
- 1 tablespoonbutter or neutral oil, for greasing
Step-by-Step Instructions
Follow along and mark each step complete as you cook
In a large bowl, whisk the flour, sugar, baking powder, baking soda, and salt together for about 20 seconds until fully combined.
In a separate bowl, whisk the eggs. Whisk in the cooled melted butter, then the buttermilk and vanilla, if using.
Pour the wet mixture into the dry and fold with a spatula for 10 to 12 strokes only. The batter should stay lumpy with a few dry streaks. Do not whisk smooth.
Let the batter rest, uncovered, for 10 minutes. It will thicken and bubble at the surface.
Heat an electric griddle to 350°F (175°C), or a large skillet over medium-low. Water flicked on the surface should skitter and evaporate in 2 to 3 seconds. Grease lightly with butter or oil, then wipe nearly dry with a folded paper towel.
Scoop ¼ cup of batter per pancake, spacing them 2 inches apart. Cook 2 to 3 minutes, until bubbles pop across the surface, the edges look dry and matte, and the underside is deep golden.
Flip once and cook 1 to 2 minutes more. Do not press down. The center should read about 200°F (93°C) on an instant-read thermometer.
Transfer to a wire rack set over a sheet pan in a 200°F (95°C) oven. Re-grease and wipe the griddle between batches and repeat with the remaining batter.
Recipe Card Notes & Tips
- No buttermilk? Use 1¾ cups whole milk plus 1½ tablespoons lemon juice or white vinegar, stirred and rested 10 minutes before using. It won't be quite as thick, but the acid still activates the baking soda.
- Don't hold the batter longer than 30 minutes. The baking soda loses its lift and the pancakes turn out flat.
Ratings & Reviews
Leave a Review
Made this recipe? Share your thoughts, tweaks, and honest rating with other home cooks!
Community Reviews (0)
You Might Also Enjoy
More delicious recipes in Breakfast.