Sturdy Gingerbread House Recipe That Holds Its Shape
This gingerbread house recipe uses no baking soda at all, and that single omission is why the panels leave the oven the exact size you cut them. The dough bakes dark, dry and hard, the royal icing sets like plaster, and the walls stay where you put them. It spreads over two or three days, but almost all of that is waiting, not working.

Why You'll Love This Recipe
- The dough does not spread or puff, so your walls meet at true right angles instead of rounded, mismatched edges.
- One batch makes a full gingerbread house plus enough scrap dough for a tray of cookies.
- The royal icing uses meringue powder, so there is no raw egg white in something that sits on the counter for weeks.
- It keeps as a centerpiece for the whole month, not three days.
Here's the one thing nobody tells you: trim the panels a second time the moment they come out of the oven.
Lay the template back on the hot gingerbread and run a pizza wheel around it while the panel is still soft, within about two or three minutes. Even a no-spread dough shifts a fraction in the heat, and that fraction is the gap your icing has to fill later. After five minutes the gingerbread has set hard and trimming will crack it.
Read Before You Start
Build the house out of cardboard before you touch the flour. Cut your template pieces from a cereal box, tape them together, and see whether the roof actually reaches the walls. Ten minutes of cardboard saves you from discovering a sizing problem after four hours of baking a gingerbread house that will not fit together.
Roll the dough directly on the parchment you plan to bake on, cut the panels there, and peel away the scraps around them. Lifting a cut panel onto a sheet stretches it out of square, and a wall that is a quarter inch off will not sit flush against its neighbour.
Ingredient Deep Dive & Notes
All-purpose flour, not bread flour. Bread flour builds more gluten, and that gluten tightens in the oven and curls the corners of a flat panel. All-purpose gives you enough structure without the pull.
No baking soda. Most gingerbread recipes use it for lift and a tender crumb, which is exactly wrong here. Leavening creates air pockets, and air pockets are weak spots in a wall that has to carry a roof. Leaving it out also keeps the cut edges crisp instead of ballooning.
Unsulphured molasses, not blackstrap. Blackstrap is bitter and noticeably more acidic, and without baking soda in the dough there is nothing to soften that edge.
Light corn syrup alongside the molasses. Molasses is hygroscopic, meaning it pulls moisture out of the air, and moisture is what turns a crisp panel into a bendy one after a few days. Swapping a quarter of the molasses for corn syrup keeps the flavour and cuts the softening.
Do not substitute honey for molasses. Honey holds even more water than molasses does, and the walls will soften noticeably within about a day. You will see the roofline start to sag before you finish decorating.
Butter for flavour, but if you want the house on the mantelpiece until February, use vegetable shortening instead. Butter goes soft and eventually rancid; shortening does not, which is why display houses in bakery windows are almost never made with it.
Meringue powder for the icing rather than raw egg whites. It is pasteurised, it sets rock-hard predictably, and it provides structural strength. This royal icing is the exact same recipe we use to decorate our flat-backed Christmas Sugar Cookies, so one batch covers both holiday projects.
Equipment Needed
- Two rimmed baking sheets and plenty of parchment
- A stiff cardboard or cake board base, at least 12 inches square. A dinner plate is too smooth and slightly domed, and the house will slide.
- A ruler and either a craft knife or a pizza wheel for cutting panels
- A piping bag with a small round tip (a zip-top bag with the corner cut works, but the seam lines will be messier)
- Four cans or heavy mugs to brace the walls while they set
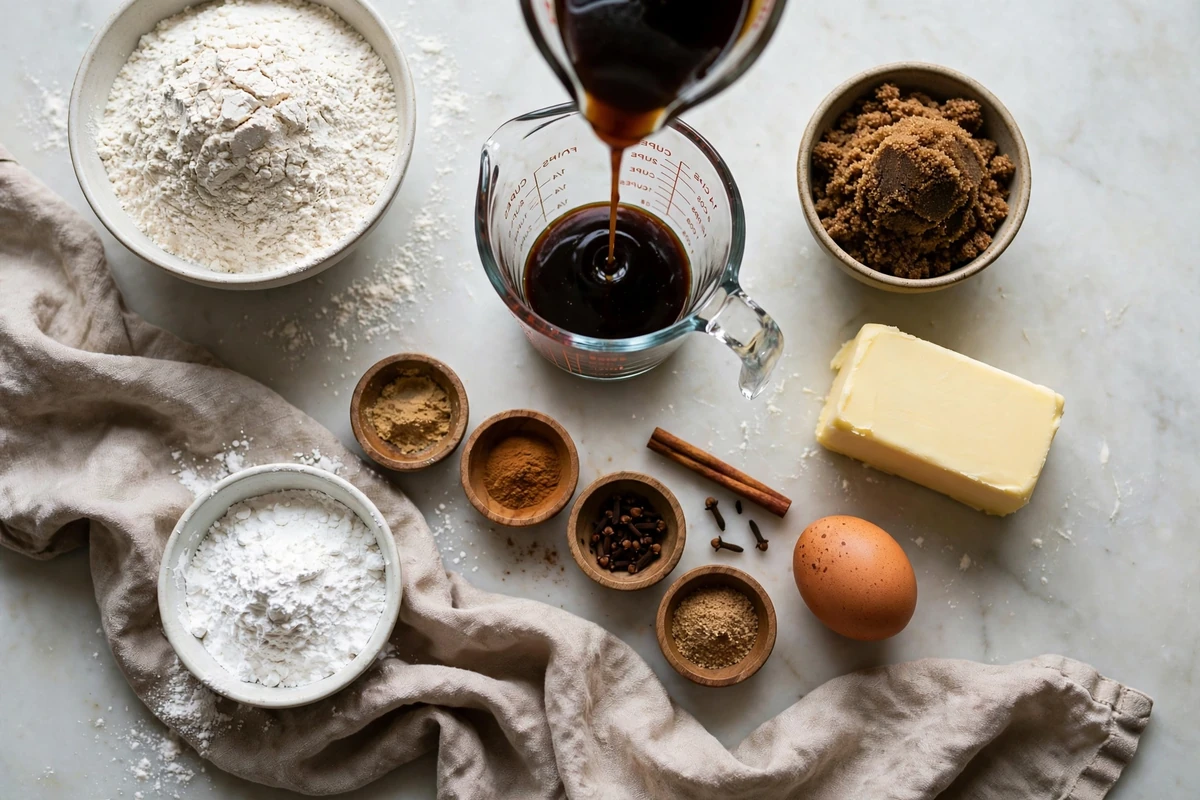
Gingerbread house ingredients including flour, molasses, spices, butter, brown sugar and royal icing ingredients
Detailed Step-by-Step Cooking Guide
1. Cut your cardboard template
2. Mix the dough
3. Chill, then roll on parchment
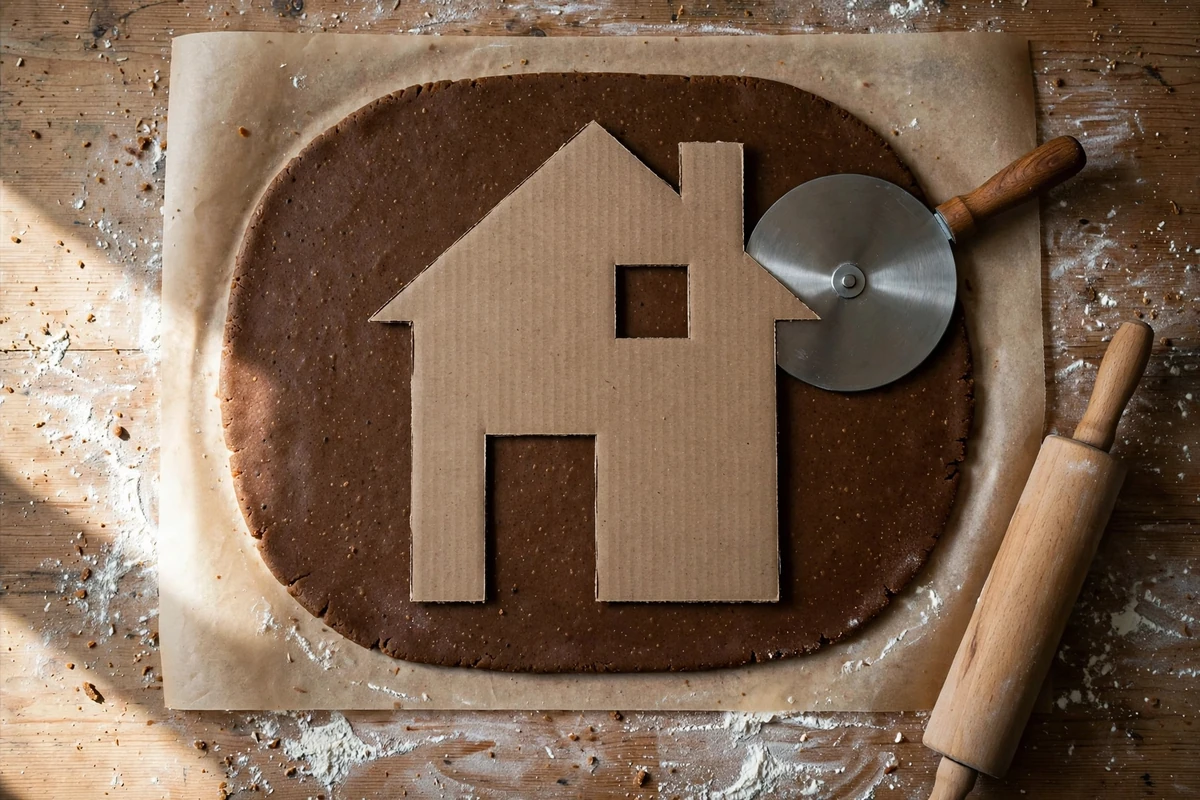
Rolling gingerbread dough directly on parchment paper with templates ready
4. Cut the panels, then chill the sheet again
5. Bake until dark and dry, then trim while hot
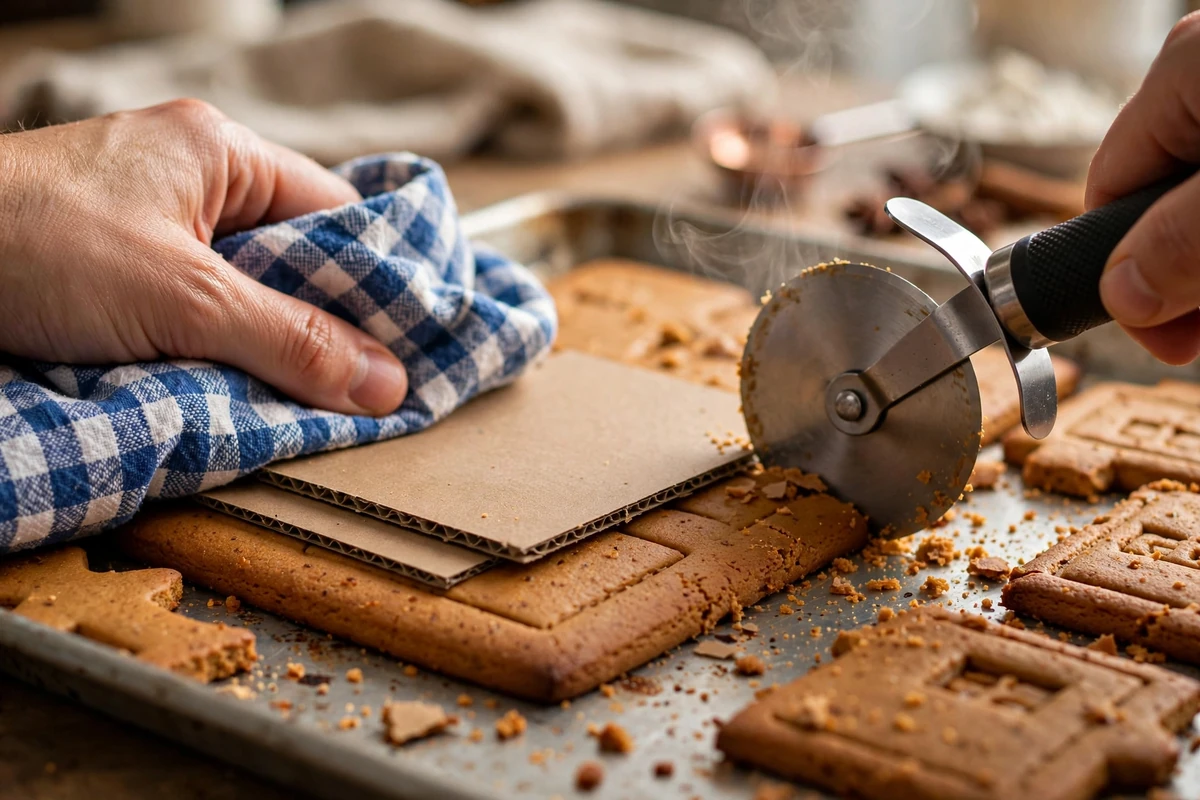
Baked gingerbread panels cooling and being trimmed hot on baking sheet
6. Dry the panels overnight
7. Mix the royal icing
8. Assemble the walls, then the roof
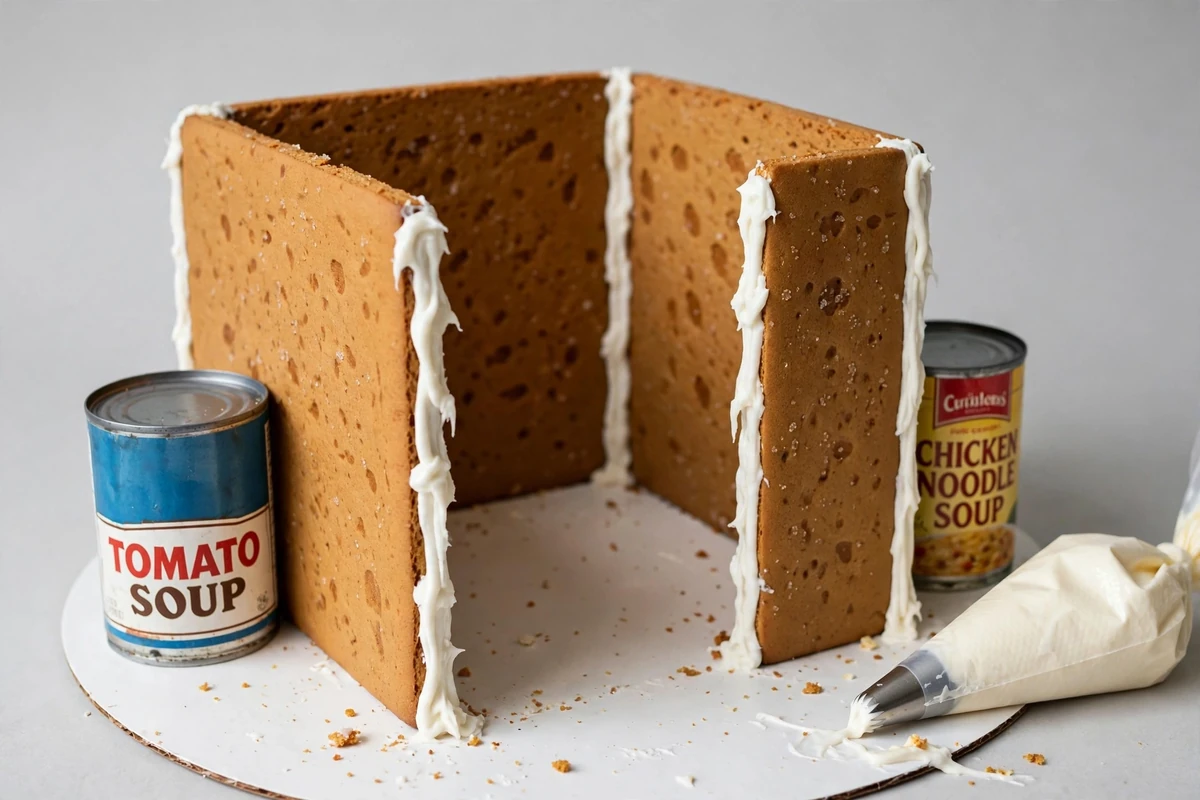
Assembling gingerbread house walls braced with cans and royal icing seams
Getting Your Gingerbread House to Stand Up Straight
A gingerbread house panel is ready when it rings slightly as you tap it and should not flex at all when you hold it by one corner. If it bends, it is underbaked or underdried, and no amount of icing will save it. Put it back in a 300°F (150°C) oven for another eight to ten minutes.
Usually means the roof went on before the wall seams had cured. Take the roof off, let the walls set another few hours, and try again.
This is a consistency problem, not a technique problem. Scrape the seam clean, stiffen the icing with more powdered sugar, and reattach. Chilling the icing bowl for ten minutes also firms it up quickly.
Humidity works against a gingerbread house the whole way through. On a damp day royal icing takes noticeably longer to set and the panels never fully harden. A fan in the room helps more than you would think.
Icing repairs are invisible once decorated. Butt the pieces together, pipe a generous line of stiff icing along the crack on the inside face, and let it dry flat overnight before using the piece.
Gingerbread house structural assembly and seam checks for straight walls
How to Use the Extra Dough and the Finished House
How to Serve, Store & Reheat
A gingerbread house is a centrepiece first and a dessert second. If you plan to eat it, break it up with a rolling pin over a tray rather than trying to cut it, and serve the pieces with coffee or hot chocolate. Crushed shards of Easy Peppermint Bark make festive gravel for the yard, while guests can sip on sparkling Christmas Punch while assembling.
Leave it uncovered at room temperature, away from steam, the dishwasher and any window that gets condensation. Do not refrigerate it. The fridge is humid, and the icing will weep and go dull. Built with butter, it stays presentable for three to four weeks; built with shortening, it will hold for months in a dry room.
There is nothing to reheat. Warming a finished house softens the icing and the panels will start to move.
No. Freezing an assembled gingerbread house causes condensation on the way back to room temperature, which dissolves the icing seams and spots the surface. You can freeze the raw dough for up to three months, and unassembled baked panels keep in an airtight container for two weeks.

Finished assembled and decorated gingerbread house centerpiece with candy and dusted sugar
Dietary Variations
Use a 1:1 gluten-free baking blend that contains xanthan gum, and add an extra 20 minutes of chilling before rolling. Gluten-free panels are more brittle, so bake them two or three minutes longer to dry them out fully, and cut the wall dimensions down by half an inch each way to reduce the span they have to carry.
A firm vegan block butter works directly in place of dairy butter at the same weight. Avoid soft tub spreads, which carry more water and will make the dough spread. Vegetable shortening is the more reliable dairy-free choice and gives a longer-lasting house.
Replace the egg in the dough with three tablespoons of aquafaba. For the icing, whip six tablespoons of aquafaba with the powdered sugar instead of meringue powder and water. Aquafaba icing sets slightly softer, so add an extra hour to every setting stage.
The temptation with a gingerbread house is to treat the bake as the hard part and the assembly as the fun part. It is the other way around.
Everything that determines whether the house stands happens in the drying stages, and those stages are entirely passive.
If you have one afternoon and one evening, spend the afternoon baking and the evening doing nothing, then build the next morning.
A house assembled from panels that dried overnight behaves like a completely different material than one built from panels that cooled for an hour.
Allergen Notice: This recipe contains wheat (gluten), dairy and egg. Meringue powder is made from dried egg white, so the icing contains egg even if you use an egg-free dough. Substitutions: a 1:1 gluten-free blend for the flour, vegan block butter or shortening for the butter, aquafaba for both the egg and the meringue powder. Ingredient formulations vary between brands, so always check labels yourself. Nothing here should be treated as safe for a specific allergy without your own verification.
Frequently Asked Questions
Recipe Visual Gallery (6 Full Photos)
Recipe Card & Steps
Ingredients Checklist
Click an item to check it off as you prep
- 5 cups (600 g)all-purpose flour, plus more for rolling
- 1 tbspground ginger
- 1 tbspground cinnamon
- 1 tspground cloves
- 1/2 tspground nutmeg
- 1 tspfine salt
- 1 cup (226 g)unsalted butter, softened (or vegetable shortening for a longer-lasting house)
- 1 cup (200 g)packed dark brown sugar
- 3/4 cup (255 g)unsulphured molasses
- 1/4 cup (85 g)light corn syrup
- 1large egg, at room temperature
- 4 cups (480 g)powdered sugar, sifted
- 3 tbspmeringue powder
- 6 to 7 tbspwarm water
- Assorted hard candies, candy canes and candy discs (optional)
- Extra powdered sugar for dusting (optional)
Step-by-Step Instructions
Follow along and mark each step complete as you cook
Cut a cardboard template: two side walls 5 by 4 inches, two gabled end walls 5 inches wide and 4 inches to the eaves rising to a 7 inch peak, two roof panels 6 by 5 inches. Tape it together to check the fit.
Beat the butter and brown sugar on medium for about 1 minute, until combined but not fluffy. Add the molasses, corn syrup and egg and mix until smooth.
Whisk the flour, ginger, cinnamon, cloves, nutmeg and salt together, then add to the bowl in two additions on low speed. Mix until the dough forms a stiff, dark mass that pulls away from the bowl.
Divide the dough in two, flatten into 1 inch thick rectangles, wrap and refrigerate for 2 hours.
Roll each half on its own sheet of parchment to an even 1/4 inch thickness. Lay the templates on top and cut around them with a pizza wheel, leaving 1/2 inch between pieces. Peel away the scraps.
Slide each parchment sheet onto a baking tray and chill for 20 minutes. Heat the oven to 350°F (175°C).
Bake for 20 to 25 minutes, until the edges are noticeably darker than the centres and the panels are firm and dry with no give when pressed. Trim each panel with the template within 2 to 3 minutes of leaving the oven, then rest on the tray for 10 minutes.
Move the panels to a wire rack, uncovered, and leave for at least 8 hours or overnight.
Beat the powdered sugar, meringue powder and 6 tbsp warm water on low, then medium, for 5 minutes, until the icing holds a stiff upright peak. Set aside a third and thin it with water for detail piping. Keep both covered with a damp cloth.
Pipe stiff icing along the base edge of each wall and press onto a sturdy board, piping the vertical corner seams as you go. Hold each piece for 1 minute and brace with cans. Let the walls set for at least 2 hours.
Pipe icing along the top edges, set the roof panels in place, hold for 1 to 2 minutes each and prop until stable. Leave the bare structure overnight to cure.
Decorate with candies attached using the stiff icing, and pipe details with the thinned icing. Dust with powdered sugar.
Recipe Card Notes & Tips
- If your icing peak folds over, beat in more powdered sugar a tablespoon at a time. Runny icing is the main cause of collapse.
- Rerolled scrap dough is more prone to air bubbles. Use it for cookies rather than structural panels, baking them for 12 to 14 minutes.
Ratings & Reviews
Leave a Review
Made this recipe? Share your thoughts, tweaks, and honest rating with other home cooks!
Community Reviews (0)
You Might Also Enjoy
More delicious recipes in Desserts.

Classic Butter Cookies Recipe